
티스토리 뷰
1. 바닐라 자바스크립트 SPA 이벤트 관리 방법
1-1. index.html에 모든 레이아웃을 집어넣고 display: none 속성을 준 뒤, 필요한 경우에 보여준다.
- 장점: 이벤트를 한번만 걸면 된다.
- 단점:
- 최초 로딩 시간이 길어진다.
- 사용자가 display: none 속성을 해제하여 내용을 확인할 수 있으므로 보안상 위험하다.
- App의 크기가 커질수록 index.html 관리가 힘들다.
1-2. App이 최초 실행될 때, 필요한 DOM을 모두 생성해놓은 뒤, 필요할 때마다 replaceChild로 DOM을 교체한다.
- 장점: 이벤트를 한번만 걸면 되고 component 별로 template 관리가 가능하다.
- 단점: 최초 로딩 시간이 길어진다.
1-3. 메인 컨테이너 이벤트 위임
- 장점:
- innerHTML로 DOM이 변경되어도 이벤트가 정상적으로 동작한다.
- index.html이 단순하다.
- 단점:
- 이벤트 분기가 매우 복잡해진다.
1-4. innerHTML로 DOM을 변경함과 동시에 이벤트를 새로 생성한다.
- 장점:
- innerHTML로 DOM이 변경되어도 이벤트가 정상적으로 동작한다.
- index.html이 단순하다.
- 단점:
- 화면이 변경될 때마다, 이벤트를 동적으로 관리해줘야 한다.
- 이벤트를 계속해서 생성해야하는 비용이 발생한다.
2. 서비스 레이어
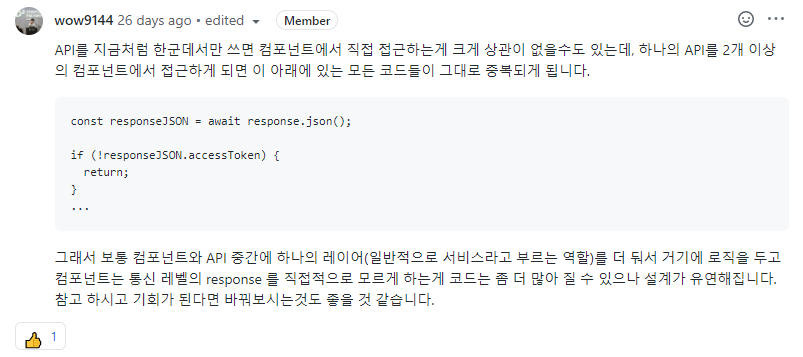
자프 리뷰어님의 말씀대로 컴포넌트와 API 중간에 서비스 레이어를 추가함으로써 중복된 코드를 줄일 수 있었다. 무엇보다도 컴포넌트에서 API를 호출하여 데이터를 가져오고자 할 때, HTTP status를 신경쓰지 않고 않아도 된다는 장점이 있었다. 마치 네트워크를 TCP/IP 4계층으로 나누어 각 레이어의 구체적인 동작을 몰라도 사용이 가능하도록 한 것과 비슷하다. 또한 중복된 코드를 추상화하여 중간에 로직이 변경되도 전체 로직을 변경할 필요없이 서비스 레이어의 로직만 변경하면 된다는 장점이 있다.
export const serviceAPI = {
  isValidToken: async (token) => {
    try {
      await API.getUserInfo(token);
      return true;
    } catch (err) {
      console.error(err);
      return false;
    }
  },

  getAccessToken: async ({ email, password }) => {
    try {
      const response = await API.login({ email, password });
      const responseJSON = await response.json();

      return responseJSON.accessToken || null;
    } catch (err) {
      console.error(err);
      return null;
    }
  },

  signup: async ({ email, password, name }) => {
    try {
      await API.signup({ email, password, name });

      return true;
    } catch (status) {
      console.error(status);
      return false;
    }
  },
 }
3. API request 로직
아래와 같이 코드를 작성하면 새롭게 API request 메서드를 추가할 때 편리하다.
const _request = async (url, option = {}) => {
  try {
    const response = await fetch(`${BASE_URL}${url}`, option);
    if (!response.ok) {
      throw response.status;
    }

    return response;
  } catch (status) {
    throw status;
  }
};

const getOption = ({ method, contents, token }) => {
  const option = {
    method: method,
    headers: {
      'Content-Type': 'application/json',
    },
  };

  if (contents) {
    option.body = JSON.stringify(contents);
  }

  if (token) {
    option.headers.Authorization = `Bearer ${token}`;
  }

  return option;
};

const request = {
  get: async (info) => {
    const { url, token } = info;
    const option = getOption({ method: 'GET', token });

    return _request(url, option);
  },

  post: async (info) => {
    const { url, contents, token } = info;
    const option = getOption({ method: 'POST', contents, token });

    return _request(url, option);
  },

  delete: async (info) => {
    const { url, token } = info;
    const option = getOption({ method: 'DELETE', token });

    return _request(url, option);
  },

  put: async (info) => {
    const { url, contents, token } = info;
    const option = getOption({ method: 'PUT', contents, token });

    return _request(url, option);
  },
};

export const API = {
  // Auth
  signup: ({ email, password, name }) => {
    return request.post({
      url: '/members',
      contents: { email, password, name },
    });
  },

  login: ({ email, password }) => {
    return request.post({
      url: '/login/token',
      contents: { email, password },
    });
  },
  // 그 외...
 }
4. customEvent와 dispatchEvent
이벤트를 직접 생성하고 생성한 이벤트를 발생시킬 수 있다.
이 둘을 잘 사용하면 실제로 이벤트가 발생하지 않아도 이벤트가 발생한 것처럼 만들 수 있어 로직을 간단하게 할 수 있다. ex) 모달 창에서 특정 역을 추가하면 모달 밖의 <select>에서 생성된 역의 <option>이 selected 되도록 할 수 있다.
이벤트 생성자로 이벤트 생성
const event = new Event(type[, options]);

Element.dispachEvent(event)
5. HTMLFormElement.reset()
지정된 Form 내부의 값들을 defaultValue로 리셋한다. 이를 사용하면 Form 안의 값들을 일일이 찾아서 초기화 할 필요가 없다. 단, input의 disabled 같은 속성은 리셋 할 수 없다.
HTMLFormElement.reset() - Web APIs | MDN
HTMLFormElement.reset() The HTMLFormElement.reset() method restores a form element's default values. This method does the same thing as clicking the form's reset button. If a form control (such as a reset button) has a name or id of reset it will mask the
developer.mozilla.org
6. Form 안의 value 받아오기
event.taget[input-name].value === event.target.elements[input-name].value
import { $ } from './DOM.js';

const $infoForm = $('#info-form');

const handleSubmit = e => {
  e.preventDefault();
  console.log(e.target['name'].value); // 곤이
  console.log(e.target['age'].value); // 25
};

$infoForm.addEventListener('submit', handleSubmit);
import { $ } from './DOM.js';

const $infoForm = $('#info-form');

const handleSubmit = e => {
  e.preventDefault();
  console.log(e.target.elements['name'].value); // 곤이
  console.log(e.target.elements['age'].value); // 25
};

$infoForm.addEventListener('submit', handleSubmit);
7. remove DOM의 참 의미
remove 메서드는 DOM element를 DOM tree에서 제거한다. 이 때의 '제거'는 메모리에서 삭제를 의미하지 않는다.
단순히 DOM tree에서 떼어내기만 할 뿐 메모리에는 그대로 남아있다.

MDN 문서에도 'removes the object from ...'이라고 나와있지만 정확한 표현은 'remove'가 아니라 'detach'가 맞다.
const $title = $('#title');
console.log($title); // <h1 id="title">안녕하세요</h1>
$title.remove(); // remove지만 실제로는 detach
console.log($title); // <h1 id="title">안녕하세요</h1>
$('#app').append($title); // 웹 화면에 '안녕하세요'가 정상적으로 나옴
8. History API를 이용한 PJAX
<!DOCTYPE html>
<html>
  <head>
    <meta charset="UTF-8" />
    <meta name="viewport" content="width=device-width, initial-scale=1.0" />
    <title>PJAX</title>
  </head>
  <body>
    <nav>
      <ul id="navigation">
        <li><a href="/">Home</a></li>
        <li><a href="/about">About</a></li>
        <li><a href="/Contact">Contact</a></li>
      </ul>
    </nav>
    <div class="container"></div>
  </body>
</html>
위 예제를 살펴보면 link tag(<a href="/service">Service</a> 등)의 href 속성에 path를 사용하고 있다. 네비게이션이 클릭되면 해당 링크의 path가 추가된 URI가 서버로 요청된다. PJAX 방식은 이 과정에서 네비게이션 클릭 이벤트를 캐치하고 preventDefault를 사용하여 서버요청을 방지한다. 이후, href 어트리뷰트에 있는 path를 사용하여 AJAX 요청을 한다.
이때 AJAX 요청 자체는 주소창의 URL을 변경시키지 않아 history 관리가 불가능하다. 이때 사용하는 것이 pushState 메서드다. pushState 메서드는 주소창의 URL을 변경하고 URL을 history entry로 추가한다.
const root = document.querySelector(".container");
const navigation = document.getElementById("navigation");

const routes = {
  "/": "/data/home.json",
  "/service": "/data/service.json",
  "/about": "/data/about.html",
};

const render = async (path) => {
  const url = routes[path];
  const res = await fetch(url);
  const { title, content } = await res.json();
  root.innerHTML = `<h1>${title}</h1><p>${content}</p>`;
};

window.addEventListener("popstate", (e) => {
  render(e.state.path);
});

navigation.addEventListener("click", (e) => {
  if (!e.target.matches("#navigation > li > a")) return;
  e.preventDefault();
  const path = e.target.getAttribute("href");
  history.pushState({ path }, null, path);
  render(path);
});

// 최초 초기화 페이지
render("/");
PJAX 방식은 서버에 새로운 요청을 보내지 않으며 따라서 페이지가 새로고침 되지 않는다. 하지만 페이지마다 고유의 URL이 존재하므로 history를 관리할 수 있다. 다만, 브라우저의 새로고침 버튼을 클릭하면 https://localhost:8080/about와 같은 요청이 서버로 전달되는데, 이때 서버는 URL에 따라 해당 리소스를 HTML로 클라이언트에 응답해주어야 최초 화면이 표시될 수 있다. (참고 - 준 강의 내용 중)
'개발 일기 > 우아한테크코스-FE' 카테고리의 다른 글
| 우아한테크코스 프론트 : Lv.2-2 페이먼츠 미션 인사이트 (0) | 2021.05.15 |
|---|---|
| 우아한테크코스 프론트 : Lv.2-1 로또 미션 인사이트 (1) | 2021.04.26 |
| 우아한테크코스 프론트 : Lv.1-3 나만의 유튜브 강의실 미션 인사이트 (0) | 2021.03.16 |
| 우아한테크코스 프론트 : Lv.1-2 로또 인사이트 (0) | 2021.03.07 |
| 우아한테크코스 프론트 : 첫 테코톡 발표를 마치며 (0) | 2021.02.19 |
- Total
- Today
- Yesterday
- 리액트 키
- 다라쓰
- 리액트 리스트 키
- 프론트엔드
- props를 변경하지 않는 이유
- Browser Router
- 해쉬 라우터
- 댓글 모듈
- props를 변경하지 못하는 이유
- contentEditable focus
- React key
- 브라우저 라우터
- 인사이트
- Hash Router
- Python
- 프론트
- 리액트 jsx
- 1463
- 리액트 props
- 우아한테크코스
- 백준
- localhost https
- 우테코
- mkcert
- 리액트 동작원리
- 리덕스 썽크
- 리액트 리스트 key
- Redux Thunk
- 파이썬
- 리액트 리덕스
| 일 | 월 | 화 | 수 | 목 | 금 | 토 |
|---|---|---|---|---|---|---|
| 1 | 2 | 3 | 4 | 5 | 6 | 7 |
| 8 | 9 | 10 | 11 | 12 | 13 | 14 |
| 15 | 16 | 17 | 18 | 19 | 20 | 21 |
| 22 | 23 | 24 | 25 | 26 | 27 | 28 |
| 29 | 30 | 31 |